Guide to Editing Your Numbers for Call Forwarding
Step 1 : Login to your Telnyx Mission Control account
Step 2 : Click on the NUMBERS on the top left side of the page
Step 3 : Click on MY NUMBERS tab
Step 4 : Mark the checkboxes for the numbers you'd like to edit
Step 5 : You can also select all the number on using the checkbox listed above the top number (highlighted in yellow).
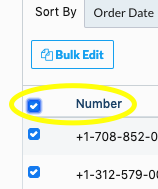
Step 6 : Once you have selected your desired numbers, click on the Bulk Edit button above the number checkbox.
Step 7 : A new window will pop up with heading Bulk Number Updates (beta).
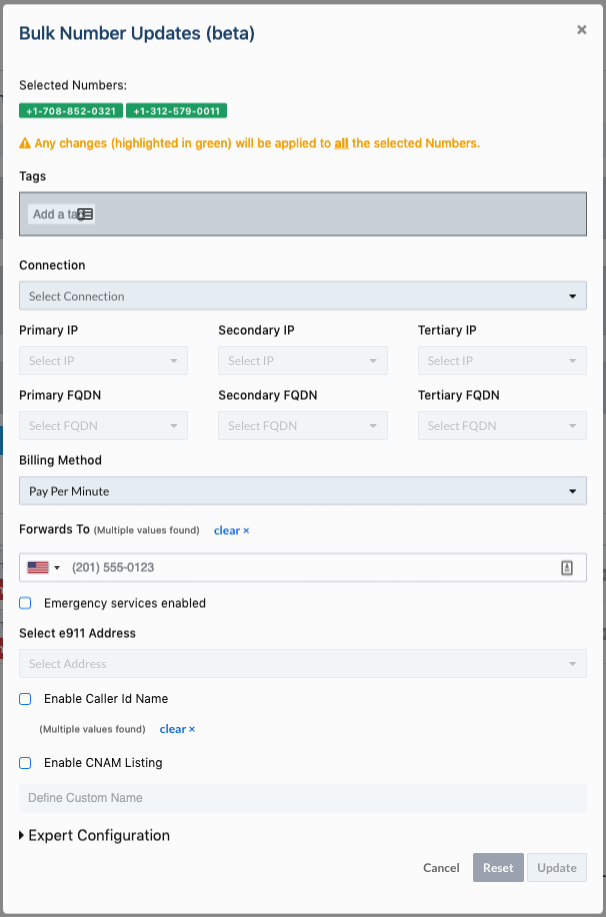
Step 8 : Click on Forwards to option & add the desired number where you want to forward your calls to. You can also choose between always or on failure for your call forwarding scenario.
Step 9 : Click on update and the desired call forwarding number will be assigned to your selected numbers.
Video Walkthrough - Editing numbers for call forwarding
PLEASE NOTE: This is a bulk edit function and any changes you make will be applied to all of the numbers you have selected.
Related Articles